Holiday Notice: Closed: 4 July and 26 July 2026. Orders placed after 1 July 2026 will ship from 28 July 2026 onwards.
Holiday Notice: Our studio will be closed between 4 July and 26 July 2026. Orders placed after 1 July 2026 will be processed and dispatched from 28 July 2026 onwards. We appreciate your understanding.
How to apply your wedding car sticker
STICKERS WITH OUT THE SEE-THROUGH TRANSFER PAPER
Simply peel the vinyl sticker off the white (or blue) backing paper and stick it onto a dry, clean and smooth surface.
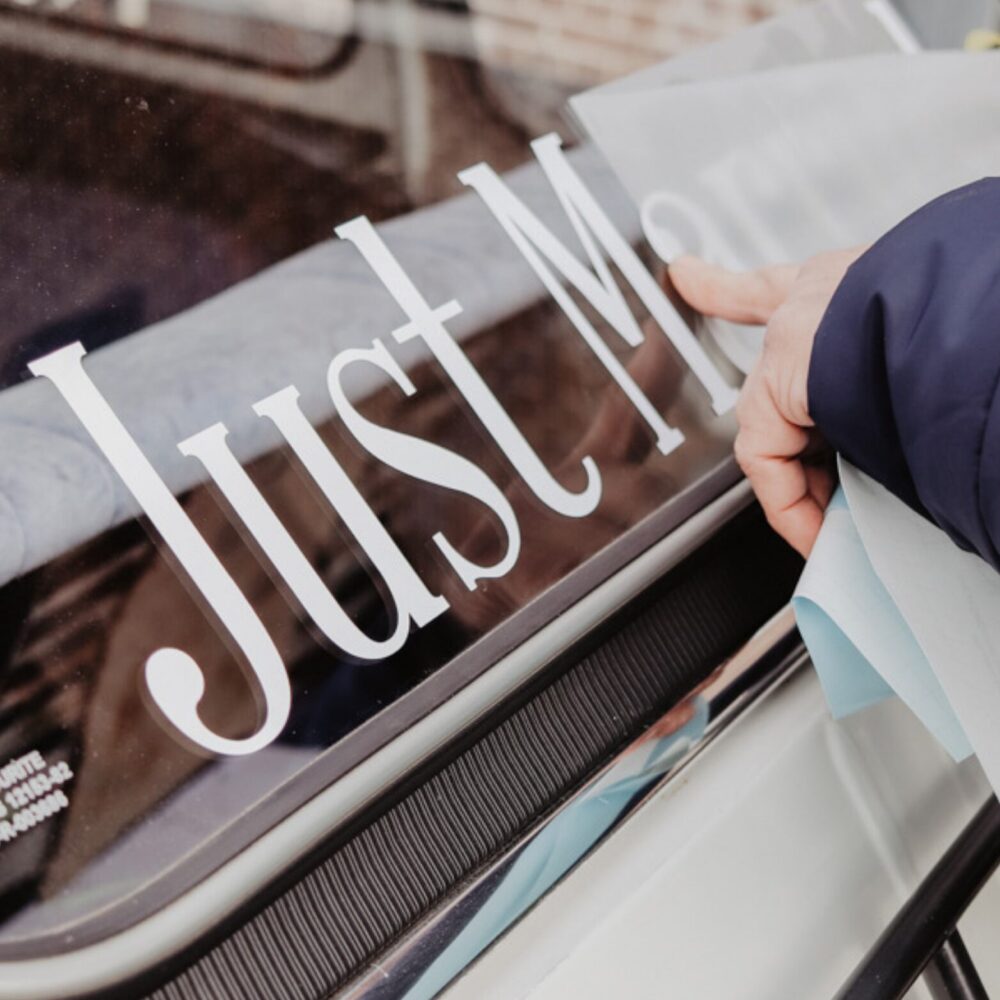
STICKERS | DECALS WITH THE SEE-THROUGH TRANSFER PAPER
– Follow the photo instructions below.
Your decal consists of three layers: 1 The white backing paper, 2 The actual vinyl decal, 3 The see-through transfer paper
STEP 1 | Prepare the Surface and Position
Clean the car window and dry it thoroughly. If you are using an artist’s canvas, paint it first to ensure a secure application. If you have recently painted, we suggest allowing 30 days before applying your stickers/decals to make sure the paint is set. If you don’t let the paint settle there is a chance that the decals might settle with your paint which will cause damage when you remove them at a later date.
Position the decal (all three layers still together) where you want it to sit. Level it, mark the position with washi tape or another low-tack tape at the top two corners (as per the images below) or at the bottom two corners of the sticker.
STEP 2 | Prepare the decal
Remove the backing paper from the decal. (The backing paper is blue for the white stickers and white for all other colours.) The vinyl decal may have pulled away from the transfer paper during shipping. Place the product (clear side up) on a smooth flat surface. Take a credit card and use the edge to rub firmly across the entire image. Start from the center and work out to the edges. This action will adhere to the vinyl decal to the transfer paper. Try to work out any bubbles you see by pressing them towards the edge. Remove the backing paper. Lift the transfer tape starting in one corner, leaving the backing behind and just lifting the image with the see-through transfer paper. If you notice a portion getting left behind, rub the transfer paper back onto that area and bend the backing paper as you lift that section.
(If your decal has multiple parts and you wish to space them differently, you can cut them apart and position them separately.)
STEP 3 | Apply and remove the transfer paper
After the backing paper has been removed, place the sticky vinyl and transfer paper onto the window. It will be easier if two people do this.
Go slow and work out any air bubbles with a credit card or your fingers as you go. Secure the vinyl decal to the surface. After the image is on the window, use your credit card and lightly rub the transfer paper from the center of your image to the edges to help remove any leftover air bubbles. Once again, rub the entire image applying pressure to adhere the vinyl to the surface.
Gently peel away the transfer paper starting from one corner pulling down at a tight angle across the vinyl decal. Be patient and go slow.
* If you fail to remove an unsightly air bubble you can often work it out with your fingers or credit card even after you are done. If you still are unable to remove an air bubble you can prick it with a needle and push the air out. Needle pricks are generally not visible unless you are very close to the decal.
* If you struggle with removing the transfer paper from the vinyl (step 3) – press the transfer paper down with the credit card whilst pulling it away {push & pull} action.
STEP 1 Decide where you want to stick your Decal and place the complete decal (all three layers) on the wall/window. Level it and mark the two top or bottom corners with Washi tape or any other easily removable tape.
STEP 2 Now remove the backing paper as describe above and place the decal carefully on the window using the see-through transfer layer and the washi tape as a guide.
STEP 3
Slowly remove the transfer paper as explained above. You may use a ruler instead of a credit card or scraper to help with the transfer of the bigger decals.